Friday, December 2, 2016

Create Random Post Slider Widget For BlogSpot Blogs!

Create Random Post Slider Widget For BlogSpot Blogs!

Link to My Blogger Tricks

Create Random Post Slider Widget For BlogSpot Blogs!

Posted: 02 Dec 2016 07:18 AM PST

Create Random Post Slider For Blogspot blogsEver wondered you could display images randomly inside a blogger slider? So far we have shared dynamic recent posts slider and a static slider, today for the first time online, we are releasing a Random Post Slider for BlogSpot blogs which is built using Blogger JSON Feeds API, FlexSlider and jQuery. A fully responsive image slider that will automatically display your random posts on your homepage or sidebar, almost anywhere you want.  Lets learn how to create a random slider for blogspot in simple steps but before that lets see a live demo!

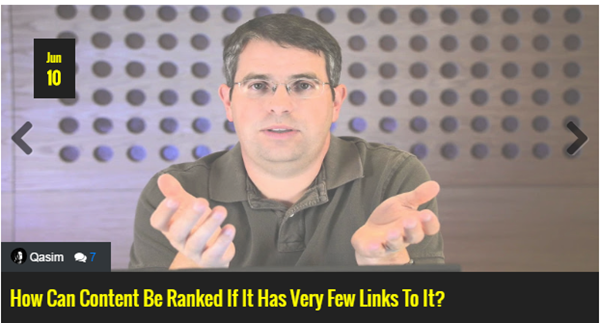
What is Blogger Random Post Slider Widget?

Due to the natural structure of blogging platforms such as blogspot, articles end up being buried down once they get old. New users often avoid navigating through all your labels/categories, as a result most of your best content receives no attention at all. A random post slider is the best way to showcase your oldest posts to your visitors. The slider widget will pick your old posts randomly and automatically display the thumbnails either on homepage or sidebar depending on what location best suits you. The slider rotates in a clockwise direction where each slide is both responsive and dynamic.

Features of Blogger Random Post Slider Widget

Each slide will display useful data which is fetched using a JSON Call. Features supported include:

  • Article comments count,
  • Author avatar,
  • Author name,
  • Published date,
  • Labels,
  • Featured Thumbnail,
  • Third Party Thumbnail Support,
  • YouTube Thumbnail Support,
  • Editable Title,
  • Mobile responsive (Smartphones/ Tablets/ Laptops/ Desktop Screens supported)

Create and Random Post Slider in Blogger

Follow these easy steps:

  1. Go To Blogger > Template
  2. Backup your template
  3. Click "Edit HTML"
  4. Just below <head> tag paste the following JS and CSS source links:

    <script src='http://ajax.googleapis.com/ajax/libs/jquery/1/jquery.min.js' type='text/javascript'></script>
    <link href='http://fortawesome.github.io/Font-Awesome/assets/font-awesome/css/font-awesome.css' rel='stylesheet'/>
    <link href='http://fonts.googleapis.com/css?family=Oswald' rel='stylesheet' type='text/css'/>
    <link href='https://cdnjs.cloudflare.com/ajax/libs/flexslider/2.6.1/flexslider.min.css' rel='stylesheet' type='text/css'/>
    <script src='https://cdnjs.cloudflare.com/ajax/libs/flexslider/2.6.1/jquery.flexslider.min.js' type='text/javascript'></script>

    Note: Do not add JQuery, FontAwesome, FlexSlider or Oswald source links to your template if you are already using them on your site.

  5. Next search ]]></b:skin> and just above/before it paste the following code:

    /*######### Random Posts By MyBloggerTricks #############*/
    .mbt-random{margin:0 5px;border:0;width:100%;overflow:hidden}
    .mbt-random .slides{list-style-type:none;margin:0 auto;padding:0}
    .mbt-random li{color:#fff;font-family:helvetica;font-size:12px;overflow:hidden;padding-top:10px}
    .mbt-random .flex-control-nav li{display:inline-block;margin:0 2px}
    .mbt-random .flex-control-nav a{text-indent:9999px;display:block;width:10px;cursor:pointer;height:10px;background-color:#000;border:1px solid #000;border-radius:0!important}
    .flex-direction-nav .flex-prev{left:-50px}
    .flex-direction-nav .flex-next{right:-50px;text-align:right}
    .mbt-random .flex-control-paging{display:none}
    .flex-direction-nav{position:relative;top:-250px}
    .mbt-random .flex-control-nav a.flex-active{background-color:#84db06;border:1px solid #90f128}
    .mbt-random .flex-div{margin:0 auto;display:block;padding:0!important;position:relative;height:370px}
    .mbt-random li a{color:#0080ff;text-decoration:none}
    .mbt-random i{color:#999;padding-right:5px}
    .mbt-random .iline{line-height:2em;margin:0;position:relative;top:-90px;background:#56adff;padding:3px 10px;display:inline-block}
    .mbt-random .icontent{line-height:1.5em;margin-top:5px}
    .mbt-random div span{margin:0 5px 0 0;display:inline-block;font-weight:400}
    .mbt-random .mbttitle{font-family:oswald;font-size:20px;color:#fff;font-weight:400;text-decoration:none;position:relative;top:-90px;background:#66b5ff;padding:15px 10px;display:block}
    .mbt-random .mbttitle:hover,.mbt-random .itotal a:hover{color:#fff;text-decoration:none}
    .mbt-random .iedit a{text-decoration:none;color:#999;cursor:pointer}
    .mbt-random .iedit:before,.mbt-random .iauthor:before,.mbt-random .itag:before,.mbt-random .icomments:before,.mbt-random .idate:before,.mbt-random .itotal span:before{font-family:fontAwesome;position:relative;padding-right:8px;color:#fff}
    .mbt-random .iauthorpic{width:17px!important;height:17px!important;border-radius:50%;float:none;display:inline-block!important;margin:0;padding-right:3px;position:relative;top:3px}
    .mbt-random .iFeatured{overflow:hidden;position:relative;margin:0;padding:0;width:100%}
    .mbt-random .iFeatured a{background:none;padding:0;display:block;border:0px solid #eee;margin:0 -1px}
    .mbt-random .iFeatured img{height:305px!important;-moz-transition:all .3s;-webkit-transition:all .3s;transition:all .3s;border-radius:0;margin:0;padding:0;opacity:.7}
    .mbt-random .iFeatured:hover img{opacity:1;-moz-transform:scale(1.4);-webkit-transform:scale(1.4);transform:scale(1.4)}
    .mbt-random .icomments a, .mbt-random .itag a{color:#0080ce;font-family:arial;font-size:12px}
    .mbt-random .icomments a:hover, .mbt-random .itag a:hover{text-decoration:underline}
    .mbt-random .itag:before{content:'\f02c';padding:0 3px 0 7px;color:#fff}
    .mbt-random .icomments:before{content:'\f086';padding:0 3px 0 7px;color:#fff}
    .mbt-random .idate{color:#fff;padding:3px 4px;font-family:arial;font-size:11px}
    .mbt-random .idate:before{content:'\f073';padding:0 5px;color:#fff}

  6. Make these changes

    • To change the blue background color behind the title edit: #66b5ff
    • To change the light blue background behind Author name edit: #56adff
    • To change the white color of the Title text edit: #fff
    • To change the color of the comment and labels link edit: #0080ce
  7. Save your template.
  8. Now go to Blogger > Layout
  9. Select "Add a Gadget"
  10. Choose "HTML/JavaScript" gadget
  11. Keep the title field empty and then paste the following code inside it:

    <script type="text/javascript">
    //################### Defaults
    var ListBlogLink = "http://mybloggertricks.com";
    var ListCount = 4; 
    var TitleCount = 66;
    var ImageSize = 800;

    $(window).load(function() {
      $('.mbt-random').flexslider({
       animation: "slide",
        itemWidth: 600,
    itemMargin: 25,
      directionNav: true,
           touch: true,
           slideshowSpeed: 2500,
          pauseOnHover: true,
         animationSpeed: 700,
      });
    });

    var RandomArray = [];
    var TotalPosts  = 0;
    var RandomArray = new Array(ListCount);
    function TotalCount(json) {
        TotalPosts   = json.feed.openSearch$totalResults.$t
    }
    document.write('<script type=\"text/javascript\" src=\"'+ListBlogLink+'/feeds/posts/default?alt=json-in-script&callback=TotalCount\"><\/script>');

    function GenerateNum() {
        for (var i = 0; i < ListCount ; i++) {
        for (var j = 0; j < RandomArray.length; j++){
        var RandomNum = Math.floor(Math.random() * (TotalPosts ) + 1);
        RandomArray[i] = RandomNum; }
                                                                      }
    }

    </script>

    <div class="flexslider mbt-random">
    <ul class="slides">
    <script type="text/javascript">
    //################### Function Start
    function mbtrand(json) {
    for (var i = 0; i < json.feed.entry.length; i++)

    //################### Variables Declared
    var listing= ListImage = ListUrl = ListTitle = ListImage = ListContent = ListConten = ListAuthor = ListTag = ListDate = ListUpdate = ListComments = thumbUrl = TotalPosts = sk = AuthorPic= ListMonth = Y = D = M = m = YY = DD = MM = mm = TT =  "";
    //################### Category

    if (json.feed.entry[i].category != null)
    {
    for (var k = 0; k < json.feed.entry[i].category.length; k++) {
    ListTag += "<a href='"+ListBlogLink+"/search/label/"+json.feed.entry[i].category[k].term+"'>"+json.feed.entry[i].category[k].term+"</a>";
    if(k < json.feed.entry[i].category.length-1)
    { ListTag += ", ";}
    }
    }
    //################### URL
    for (var j = 0; j < json.feed.entry[i].link.length; j++) {
          if (json.feed.entry[i].link[j].rel == 'alternate') {
            break;
          }
        }
    ListUrl= "'" + json.feed.entry[i].link[j].href + "'";
    //################### Info
    TotalPosts = json.feed.openSearch$totalResults.$t;
    if (json.feed.entry[i].title!= null)
    {
    ListTitle= json.feed.entry[i].title.$t.substr(0, TitleCount);
    }
    if (json.feed.entry[i].thr$total)
    {
    ListComments= "<a href='"+json.feed.entry[i].link[j].href+"#comment-form'>"+json.feed.entry[i].thr$total.$t+"</a>";
    }
    ListAuthor= json.feed.entry[i].author[0].name.$t.split(" ");
    ListAuthor=ListAuthor.slice(0, 1).join(" ");
    AuthorPic = json.feed.entry[i].author[0].gd$image.src;
    //################### Date Format
    ListMonth= ["Jan", "Feb", "Mar", "Apr", "May", "Jun", "Jul", "Aug", "Sep", "Oct", "Nov", "Dec"];
    ListDate= json.feed.entry[i].published.$t.substring(0,10);
                             Y = ListDate.substring(0, 4);
                            m = ListDate.substring(5, 7);
                             D = ListDate.substring(8, 10);
                             M = ListMonth[parseInt(m - 1)];                      
    ListUpdate= json.feed.entry[i].updated.$t.substring(0, 16);
                             YY = ListUpdate.substring(0, 4);
                            mm = ListUpdate.substring(5, 7);
                             DD = ListUpdate.substring(8, 10);
                             TT = ListUpdate.substring(11, 16);
                             MM = ListMonth[parseInt(mm - 1)];  
    //################### Thumbnail Check

    if (json.feed.entry[i].media$thumbnail)
    {
    thumbUrl = json.feed.entry[i].media$thumbnail.url;
    sk= thumbUrl.replace("/s72-c/","/s"+ImageSize+"/");
    ListImage= "'" + sk.replace("?imgmax=800","") + "'";
    }

    // YouTube scan
    else if (json.feed.entry[i].content.$t.match(/youtube\.com.*(\?v=|\/embed\/)(.{11})/) != null)
    {
        var youtube_id = json.feed.entry[i].content.$t.match(/youtube\.com.*(\?v=|\/embed\/)(.{11})/).pop();
       
        if (youtube_id.length == 11) {
            var ListImage = "'//img.youtube.com/vi/"+youtube_id+"/0.jpg'";
            }
    }

    else if (json.feed.entry[i].content.$t.match(/src=(.+?[\.jpg|\.gif|\.png]")/) != null)
    {
    // Support For 3rd Party Images
    ListImage =  json.feed.entry[i].content.$t.match(/src=(.+?[\.jpg|\.gif|\.png]")/)[1];
    }
    else
    {
    ListImage= "'https://blogger.googleusercontent.com/img/b/R29vZ2xl/AVvXsEjmHVmKC0KNO5XzkCef8dYzoxertepzPo-eG1uPFbHfkWY4cRvTNRQsBAXpjOYGxHoDa4PDggRaDicuGWobKoQ7fKy2O3Inxd1wu53KrL0WO6CNjQwOApFYISt4Zo3lZQrOfy7FKc8xY0k/s200/Icon.png'";
    }
    //###################  Printing List
    var listing = "<li><div class='flex-div'><div class='iFeatured'><a  href="
    + ListUrl+
      "><img src="
    +ListImage+
    "/></a></div><div class='iline'><span class='iauthor'><img class='iauthorpic' src='"+AuthorPic+"'/>"
    +ListAuthor+
    "</span><span class='icomments'>"
    +ListComments +
    "</span> <span class='idate'>"
    + D +
    " "
    + M +
    "</span><span class='itag'>"
    +ListTag +
    "</span></div><a class='mbttitle' href="
    +ListUrl+
    "target='_blank'>"
    +ListTitle+
    "</a></div></li>";

    document.write(listing);

    } }
    <!-- #### Invoking the Callback Function #### -->
    for (var i = 0; i < ListCount ; i++) {
    GenerateNum();
    var scripta = '<script type=\"text/javascript\" src=\"'+ListBlogLink+'/feeds/posts/default?alt=json-in-script&start-index='+RandomArray[i] + '&max-results=1&callback=mbtrand\"><\/script>';
    document.write(scripta);
    };

    </script>
    </ul></div>

    Make these changes to customize the slider:

    • Place your blog URL inside ListBlogLink
    • Inside ListCount  mention how many slides to display. I recommend not displaying more than 3 or 4 slides. Increasing this number will increase the number of iterations/loops and thus slowing down your site.
    • Inside TitleCount  mention the length of title characters to display. By default titles longer than 66 characters will be trimmed.
    • Inside ImageSize mention the aspect ratio or resolution of your featured thumbnails. By default the thumbnails will be 800px in width. If you wish to display the slider in sidebar only then you can decrease this value to 400px.
  12. Click Save and you are all done!

You have now successfully created blogger random post slider and have installed it on your blog template. Visit your blog to see it working just fine. If in case you troubleshoot yourself, feel free to leave your comments below and I would love to help you with all your queries.

I have installed a random post widget on my blog slider and so far it has really helped growing our audience. I wish this slider may help you equally. This is the first random slider widget of its kind published online for blogger blogs therefore do let us know how useful is this slider for you and what is your experience after installing it successfully on your template. Peace buddies! :)

If you are interested to learn how are blogger widgets developed and coded then do read:

Blogger Image Slider - Display Featured Posts in BlogSpot!

Posted: 01 Dec 2016 12:08 PM PST

Blogger Image Slider - Static and ResponsiveWe have so far discussed different types of dynamic sliders and carousels for blogspot blogs but since some of you requested a static image slider where you could display featured posts based on your selection, so I thought of sharing a jQuery Static Image Slider where you can add custom info to feature your favorite blog posts on your homepage. If in case you want to display images automatically based on a specific label please check:
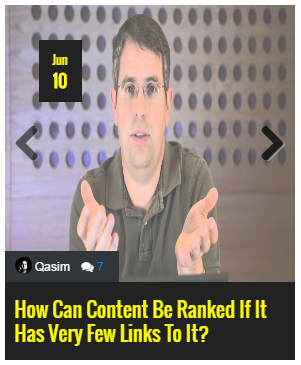
 Dynamic Blogger Slider.

Lets See a Demo first:

What is a Blogger Image Slider?

Blogger Image sliders (also known as image carousels or slideshows) is the best way to display multiple images, videos, or graphics on your website. Featured images that users can slide or swipe can draw new visitors into your site, capturing their attention immediately thus bringing you more pageviews and revenue.

Blogger Image sliders can be static or dynamic.

  1. STATIC IMAGE SLIDER: In a static slider that we are discussing today, you can manually add images based on your selection. Example: 4+ jQuery Image Sliders, Image Slideshow, the slider being discussed today.
  2. DYNAMIC IMAGE SLIDER: In a dynamic slider such as Blogger carousel or Recent posts slider that we released earlier, images are automatically displayed by pulling the latest posts from a specific blog label mentioned by you. Example: Dynamic Image Slider, Blogger Carousel

Responsive By Default

Blogger Image Slider is built using FlexSlider and it is by default Mobile responsive and fluid. It adapts automatically to different device screen sizes. See the screenshots below

[ SMARTPHONES ]

responsive slider for Smartphone

[ TABLETS / IPADS]

responsive slider for tablets

[ DESKTOP / LAPTOPS ]

responsive image slider for blogger

Add Blogger Image Slider To Your Blog

Follow the easy steps below to add this cool responsive blogger image slider to your templates.

  1. Go To Blogger > Template
  2. Backup your template
  3. Click "Edit HTML"
  4. Just below <head> tag paste the following JS and CSS source links:

    <script src='http://ajax.googleapis.com/ajax/libs/jquery/1/jquery.min.js' type='text/javascript'></script>
    <link href='http://fortawesome.github.io/Font-Awesome/assets/font-awesome/css/font-awesome.css' rel='stylesheet'/>
    <link href='http://fonts.googleapis.com/css?family=Oswald' rel='stylesheet' type='text/css'/>
    <link href='https://cdnjs.cloudflare.com/ajax/libs/flexslider/2.6.1/flexslider.min.css' rel='stylesheet' type='text/css'/>
    <script src='https://cdnjs.cloudflare.com/ajax/libs/flexslider/2.6.1/jquery.flexslider.min.js' type='text/javascript'></script>

    Note: Do not add JQuery, FontAwesome, FlexSlider or Oswald source links to your template if you are already using them on your site.

  5. Next search ]]></b:skin> and just above/before it paste the following code:

    /*######### Blogger Image Slider By MyBloggerTricks #############*/
    .mbt-s{margin:0 5px;border:0;width:100%;overflow:hidden}
    .mbt-s .slides{list-style-type:none;margin:0 auto;padding:0}
    .mbt-s li{color:#fff;font-family:helvetica;font-size:12px;overflow:hidden;padding-top:10px}
    .mbt-s .flex-control-nav li{display:inline-block;margin:0 2px}
    .mbt-s .flex-control-nav a{text-indent:9999px;display:block;width:10px;cursor:pointer;height:10px;background-color:#000;border:1px solid #000;border-radius:0!important}
    .flex-direction-nav .flex-prev{left:-50px}
    .flex-direction-nav .flex-next{right:-50px;text-align:right}
    .mbt-s .flex-control-paging{display:none}
    .flex-direction-nav{position:relative;top:-250px}
    .mbt-s .flex-control-nav a.flex-active{background-color:#84db06;border:1px solid #90f128}
    .mbt-s .flex-div{margin:0 auto;display:block;padding:0!important;position:relative;height:370px}
    .mbt-s li a{color:#0080ff;text-decoration:none}
    .mbt-s i{color:#999;padding-right:5px}
    .mbt-s .iline{line-height:2em;margin:0;position:relative;top:-87px;background:#31363a;padding:3px 10px;display:inline-block}
    .mbt-s .icontent{line-height:1.5em;margin-top:5px}
    .mbt-s div span{margin:0 5px 0 0;display:inline-block;font-weight:400}
    .mbt-s .mbttitle{font-family:oswald;font-size:20px;color:#ff0;font-weight:400;text-decoration:none;position:relative;top:-90px;background:#222;padding:15px 10px;display:block}
    .mbt-s .mbttitle:hover,.mbt-s .itotal a:hover{color:#fff;text-decoration:none}
    .mbt-s .iedit a{text-decoration:none;color:#999;cursor:pointer}
    .mbt-s .iedit:before,.mbt-s .iauthor:before,.mbt-s .itag:before,.mbt-s .icomments:before,.mbt-s .idate:before,.mbt-s .itotal span:before{font-family:fontAwesome;position:relative;padding-right:8px;color:#fff}
    .mbt-s .iauthorpic{width:17px!important;height:17px!important;border-radius:50%;float:none;display:inline-block!important;margin:0;padding-right:3px;position:relative;top:3px}
    .mbt-s .iFeatured{overflow:hidden;position:relative;margin:0;padding:0;width:100%}
    .mbt-s .iFeatured a{background:none;padding:0;display:block;border:0px solid #eee;margin:0 -1px}
    .mbt-s .iFeatured img{height:305px!important;-moz-transition:all .3s;-webkit-transition:all .3s;transition:all .3s;border-radius:0;margin:0;padding:0;opacity:.7}
    .mbt-s .iFeatured:hover img{opacity:1;-moz-transform:scale(1.4);-webkit-transform:scale(1.4);transform:scale(1.4)}
    .mbt-s .icomments a{color:#0080ff;font-family:arial;font-size:12px}
    .mbt-s .icomments a:hover{text-decoration:underline}
    .mbt-s .icomments:before{content:'\f086';padding:0 3px 0 7px;color:#fff}
    .mbt-s .idate{color: #ff0;padding: 9px 10px;font-family: Oswald;
        font-size: 12px;position: relative;top: -270px; left:-80px;
        background: #222;width: 23px;text-align: center;line-height: 1.8em;}
    .mbt-s .idate b{font-size:17px;}

  6. Make these changes

    • To change the black background color behind the title and date edit: #222
    • To change the yellow color of the slide title and date font edit: #ff0
    • To change the color of the comment link edit: #0080ff
  7. Save your template.
  8. Now go to Blogger > Layout
  9. Select "Add a Gadget"
  10. Choose "HTML/JavaScript" gadget
  11. Keep the title field empty and then paste the following code inside it:

    <script type="text/javascript">
    $(window).load(function() {
      $('.mbt-s').flexslider({
    animation: "slide",itemWidth: 600,itemMargin: 25,directionNav: true,touch: true,slideshowSpeed: 2500,pauseOnHover: true,animationSpeed: 700,});});

    </script>

    <div class="flexslider mbt-s">
    <ul class="slides">

    <!-- SLIDE 1 -->

    <li>
    <div class="flex-div">
    <div class="iFeatured">
    <a href="POST LINK"><img src="POST IMAGE" /></a></div>
    <div class="iline"><span class="iauthor"><img class="AUTHOR IMAGE" />AUTHOR NAME</span><span class="icomments"><a href="#comment-form">COMMENTS COUNT</a></span> </div><span class="idate">Jun <b>10</b></span><a class="mbttitle" href="POST LINK" target="_blank">POST TITLE</a>
    </div>
    </li>

    <!-- SLIDE 2 -->

    <li>
    <div class="flex-div">
    <div class="iFeatured">
    <a href="POST LINK"><img src="POST IMAGE" /></a></div>
    <div class="iline"><span class="iauthor"><img class="AUTHOR IMAGE" />AUTHOR NAME</span><span class="icomments"><a href="#comment-form">COMMENTS COUNT</a></span> </div><span class="idate">Jun <b>10</b></span><a class="mbttitle" href="POST LINK" target="_blank">POST TITLE</a>
    </div>
    </li>

    <!-- SLIDE 3 -->

    <li>
    <div class="flex-div">
    <div class="iFeatured">
    <a href="POST LINK"><img src="POST IMAGE" /></a></div>
    <div class="iline"><span class="iauthor"><img class="AUTHOR IMAGE" />AUTHOR NAME</span><span class="icomments"><a href="#comment-form">COMMENTS COUNT</a></span> </div><span class="idate">Jun <b>10</b></span><a class="mbttitle" href="POST LINK" target="_blank">POST TITLE</a>
    </div>
    </li>

    </ul></div>

  12. The above code will help you create three image slides. Each slide has the same code. You just need to change the required fields in this format:
    • Replace POST LINK with Post URL. It must start with http://
    • Replace POST IMAGE with the thumbnail URL. Make sure your image should be at least 600px in width.
    • Replace AUTHOR IMAGE with author image URL also called author avatar or profile image. This image could have a small size, say for instance less than 50px in width and height. Same size for width and height.
    • Replace AUTHOR NAME with author name of that post.
    • Replace COMMENTS COUNT with how many comments are posted on that post.
    • Replace Jun and 10 with month and day respectively of published date.
    • Replace POST TITLE with the textual title of the post.
    • To add an additional slide simply copy the slide code starting from <li> and ending at </li> and paste it just above </ul></div>.
  13. Finally click save your widget and you are all done!

Need help in installing Image Slider?

In my next post I will share how to create a dynamic random post slider for the first time with all of you. For the time being do kindly share your feedback on this static one. Let me know if you need any help or assistance by leaving your comments. I hope this slider will help you better feature your content on your homepage to engage your blog visitors even more. Wish you a great blogging experience. Peace buddies! :)

Share:

0 comments:

Post a Comment